A few years ago, in a new subdivision, about 16 homes were being prepared for sowing grass seed by the building contractor. One homeowner on the block decided that the thin layer of native soil on top of construction fill was not the best for a lifetime of lawn care. Before the landscape crews arrived for sowing the grass seed, the homeowner had two truckloads of mixed screened soil/compost spread over top of the contractor soil, and rototilled in. By fall, his lawn was, without a doubt, the best one on the block. It was full and healthy looking. The other lawns were struggling. What a difference soil preparation makes!
Preparing the soil
- Till: Following this homeowner’s example, preparing your lawn foundation should be considered as one of the most important steps in seeding your new lawn. Start by breaking up the compacted soil with a rototiller.
- Grade: This is the time to ensure proper drainage: make sure that the sloping allows water to flow away from your house, sidewalks, patio, etc. Fill in any low spots.
- Fertilize: Broadcast a starter fertilizer over the soil. A starter fertilizer has a higher middle number. This represents the percentage of phosphorus, which is extremely useful in root development. Even in some States that restrict phosphorus in lawn fertilizers, they do allow this important nutrient for new lawn applications.
- Soil pH: Consider, at this time, to get a soil pH test done. The right pH for growing grass is between 6.0 and 7.5; any soil pH outside this will yield a less stellar lawn. You can buy a pH test kit at a home center or nursery, or send it to a local soil test lab. This test is fast and easy and doesn’t cost much. Or, you can locate your area on the attached map. Your soil may need pH modification: low pH soil requires lime, and high pH requires peat moss and/or sulfur or aluminum sulfate.
- Amend: You should now complete the preparation by adding a layer of compost, composted manure or peat moss, and then blend everything (including starter fertilizer and pH amendments) with the rototiller.
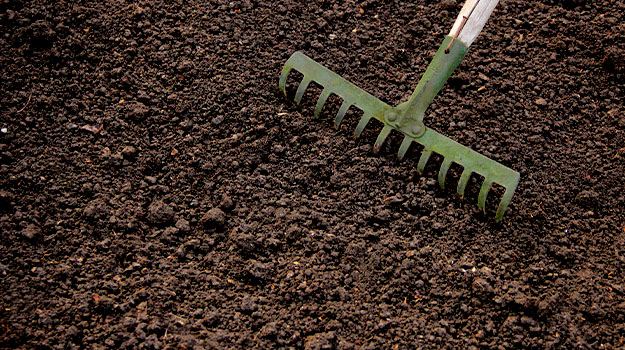
- Fine grade: With a garden rake, level out the amended soil to a nice even surface. Toss out any rocks, sticks or debris and make the surface as smooth as possible. You are now ready for seeding.
Seeding
- Select the best seed variety for your zone: All garden center retailers carry the right types of seeds for each zone. Your location will fall into 3 growing zones: cool season, warm season or transition (in between north and south). In each of those zones the most common seed mixtures will cater to both sun and shade areas, so you just need to figure out the type of lawn you wish to have: low maintenance (less mowing, less watering), strong and resilient (more kid/pet play), or deep green and thick (lush lawn).
- Best time: For northern regions of the U.S., the best time to sow grass seed is early fall and/or spring. For southern regions, it’s late spring and/or early summer.
- Apply your seed: Use a lawn fertilizer spreader to broadcast seed uniformly. Best to spread half the seed in one direction and criss-cross the other half in the other direction to get an even distribution. Once this is done, it is important to get good seed-to-soil contact. You do this by raking the soil lightly to mix seed with soil. If possible, it’s nice to run a lawn roller over top to press in the seed.
Watering
Probably the next most important step is watering. Remember to keep foot traffic off the seeded area until established.
- First week: Water lightly but often, so about 10 minutes each time. You don’t want to overwater and create puddles and wash outs on slopes. Just keep the soil moist, even if it means doing this twice a day when it doesn’t rain. Water in early mornings and in early evenings to reduce waste from evaporation.
- Optional seed cover: To help ease the frequency of watering and still keep the seeds moist, you could sprinkle a cover of peat moss or weed-free straw over the seeded area.
- Second week: Once the seedlings are popping out, cut back watering to once a day, but for a bit longer (about 20 minutes).
- Third – fourth week: The seedlings are almost at mowing height, which means you can cut back to watering once or twice a week until fully established.
- Mowing: The first mowing should be at 4 inches of height. You need to be careful the first few times and avoid making sharp turns, as the soil is not yet firmed up.
- After care: Now is the time to apply a regular lawn fertilizer to get your lawn to grow and thicken up. Follow directions on the package. Note: do not use weed & feed types of fertilizers until at least the 4th And do not use pre-emergent crabgrass fertilizers as those will keep your seeds from germinating. Use the crabgrass type next spring.
A lawn is a permanent part of your home. While it seems that seeding a new lawn properly does take time, you only must do it once. And remember that new lawn in the subdivision: good preparation pays in the end.