
Growing our own fruits and veggies adds taste and freshness to our plate, but it also reduces our carbon footprint. However, what if we end up with too much on our hands and waste the excess? As a food waste fight expert, I felt like exploring gardening from an entirely different perspective. For a few years now, I’ve been exploring the edible potential of in-season foods, learning how to cook tops, roots and stems, and inventing recipes to maximize our harvests. It’s a great source of inspiration and it’s got me interested in what can be grown to reduce waste. That’s why I started growing luffas, zero waste sponges that are the perfect complement to dish soap bars.
The increasing popularity of the zero waste movement has drawn attention to luffa gourds, sponges that are 100% natural and compostable after use. Eco-friendly consumers are thrilled as they’ve finally found something that meets their needs. No more yellow and green sponges! The luffa sponge has proven its worth and shown that combined with an ecological soap, dishes only come out cleaner!
Where do luffa sponges come from?
The luffa sponges we buy in Quebec aren’t produced locally. Mainly harvested in the Maghreb countries and Asia, luffas arrive here with their carbon footprint. With this in mind, more and more gardeners try the luffa experience by growing what will hopefully become their dish or body sponges.
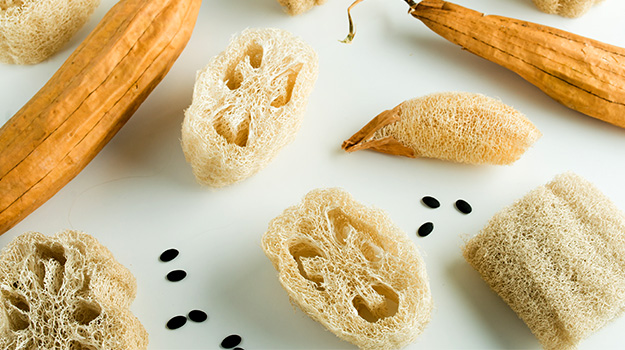
How to make a luffa sponge?
Gardeners have their eyes on luffa, and with good reason. Imagine producing enough sponges so you don’t have to buy any, while reducing waste at the same time. Growing luffas is exciting, as each plant produces several gourds. If they’re grown in optimal conditions, gardeners will get between 10 and 40 gourds per plant. And there’s more! Each gourd will also produce between 100 and 300 seeds on average. Something to build an empire on perhaps! But before you get carried away, you should know growing luffas is rather difficult. For starters, the germination rate is about 2 out of 3, even for professional gardeners...
How long does it take for luffa to grow?
Luffa gourds usually grow in countries where the average temperature is between 20 and 25 degrees Celsius. They need at least 200 frost-free days to become compact and firm enough to make sponges. If you’re planning to try your hand at growing luffas, know that they must be planted in mid-February at the latest so you can harvest them in late November or early December.
There’s a worldwide movement, the #luffachallenge, powered by star gardeners on Instagram whose ambition is to create a community that can supply itself in sponges. Toward the middle of February, the Instagram accounts of tens of thousands of amateur gardeners burst with images of luffa gourds growing.
Can you grow luffa indoors?
Our northern climate could also be an obstacle to your production. Make sure to be as successful as possible by starting production in a greenhouse with a sufficient humidity level. You’re going to have to water them and care for them every day, or every other day. Avoid placing them directly in the sun, as it could burn the foliage. If all goes as planned, you should be able to transplant them toward the end of May, once the average temperature is of 10 degrees Celsius or more.
Luffas need a lot of light and warmth, so it’s better to grow them outdoors to get a greater yield. However, if you wish to grow them indoors, make sure your tub is big enough. You’ll also need a stake so the gourds, which grow upward, can reach maturity as if they were outdoors or in a greenhouse.
It usually takes between 4 and 30 days for the first leaves to appear, regardless of the variety. So you’re going to have to be patient. Throughout the growth cycle, it’s important to maintain a high humidity level and to make sure the temperature stays between 20 and 25 degrees Celsius.
My luffa adventure
I tried my hand at growing luffas for you and I’ll let you know how it goes. Up to now, it looks like the project is going to be successful, but it won’t be as productive as I imagined... Out of 50 seeds, only 20 germinated, and 12 showed signs of growth, despite my following the instructions of luffa growing specialists. On the other hand, all had warned the first season could be a little disappointing.
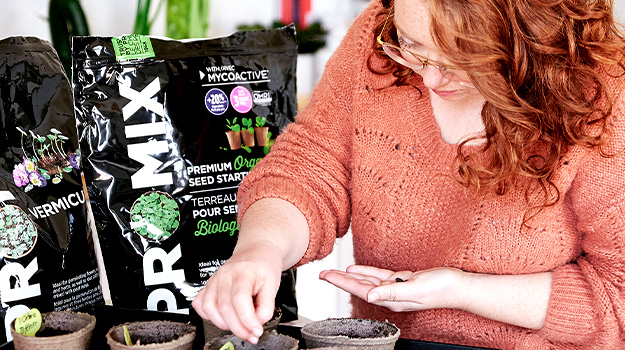
How to plant luffa seeds?
One night in mid-February, I soaked my seeds in a bowl of water to help them germinate. The next day, I filled my biodegradable pots with premium seed starting mix. I made a small hole in the soil to plant one seed per pot, and then I covered them with a little more soil and watered lightly. I added vermiculite over the plants and waited about one week for the first leaves to appear.
In a few days, I’ll be ready to begin phase 2: transplanting. I’ll tell you all about it in my next article. I’ll share my observations and let you know about the various obstacles encountered in my pursuit of my dream of selling locally grown luffas.